
#Day5:- 90 Days DevOps Challenge @ Advanced Linux Shell Scripting for DevOps Engineers.
Take the Next Step in DevOps: Advanced Linux Shell Scripting 🔧🐧 - 90 Days Challenge!"


🙏🙏💥Saltuation.
Hi friends! 🌟 Till now, you have understood some basic concepts of Linux and learned about some fundamental commands. Moving forward, let's dive deeper into shell scripting with an easy and friendly approach! 💻🐚 Let's explore the fascinating world of automating tasks and writing powerful scripts! 🚀💡.
Let's solve the below tasks for a better understanding of shell scripts! 🚀🔍📝💻.
🎯How To Create Dynamic Directories With Using Arguments🔊.
The below bash script named createDirectories.sh takes three arguments (directory name, start number, and end number) and creates the specified number of directories with a dynamic directory name:
⌨️Example 1: When the script is executed as
./createDirectories.sh day 1 90
then it creates 90 directories as day1 day2 day3 .... day90
#!/bin/bash

if [ $# -ne 3 ]; then
  echo "Usage: $0 <directory_name> <start_number> <end_number>"
  exit 1
fi

directory_name=$1
start_number=$2
end_number=$3

for (( i=start_number; i<=end_number; i++ ))
do
  dir_name="${directory_name}${i}"
  mkdir "$dir_name"
  echo "Created directory: $dir_name"
done
Save the above code in a file named createDirectories.sh, and then give it execute permission using the below command:
chmod 777 createDirectories.sh
You can now execute the script with the desired arguments to create the directories. For example:
./createDirectories.sh day 1 90
This will create 90 directories named day1, day2, day3, ..., day90. You can adjust the arguments as needed to create a different number of directories with different names.
⌨️🎯Example 2: When the script is executed as🧑💻
./createDirectories.sh Movie 20 50 then it creates 50 directories as Movie20 Movie21 Movie23 ...Movie50
You have to just change arguments according to requirements. Below is the generated 🖨️output It will make the directories from movie20 to movie50.
🖨️Output:-

🎒📜How to Create a Script to 🔙backup all your work done till now🧫.
📜📜To create a script to back up all your work done in Ubuntu, you can use the following steps🪜:
Open a text editor (e.g., vi, vim) and create a new file for the backup script. Let's name it
backup.sh:vi backup.shInside the script, you can use the
tarcommand to create a compressed archive of your work directory. For example, if you want to back up your/home/user/workdirectory then we can use the below script.We have provided the source directory, backup directory, and backup file name with date and time. Finally, save the backup file with tar.
 #!/bin/bash

 # Specify the directory to be backed up
 source_dir="/home/user/work"

 # Specify the backup destination directory
 backup_dir="/path/to/backup/folder"

 # Create a unique backup filename with date and time
 backup_filename="work_backup_$(date +%Y%m%d_%H%M%S).tar.gz"

 # Create the backup archive using tar
 tar -czvf "${backup_dir}/${backup_filename}" "$source_dir"
Save the file (
escthenwq),👤:- (Read my previous blog to know more about more basic concepts and why we use wq and so more basic commands).Give executable permission to the script:
chmod 777 backup.shTo run the backup script, execute the following command:
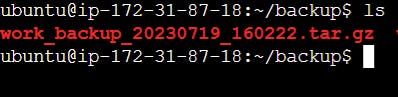
./backup.shOutput:-

The script will create a compressed archive of your
workdirectory with a unique filename that includes the date and time, and save it in the specified backup destination folder.Output:-
Remember to replace /home/user/work with the actual path to your work directory, and /path/to/backup/folder with the path to the folder where you want to store the backups.
🪡⚙️💢💢What happens if we want a backup every day? 📅 It's not possible to run it manually every day, and it becomes very hectic. 😓 To overcome this issue, we will use cron to 🚗automate the scripts at your ⚙️desired time! 🕒 So, let's understand and set up a cron job for the above script. 🚀💻
📜What Is ⚙️⚙️🚗Cron & How It Works🤔?

Hey there! 🌟 Let me introduce you to the magical world of cron! ⏰✨
What is Cron? 🕰️ Cron is like your personal time wizard 🧙♂️ in the Linux world! It's a super cool scheduling tool that helps you automate tasks and perform them at specific times or intervals. Imagine having a magical assistant that can execute your commands on schedule! 🧞♀️ That's cron for you!
How Does Cron Work? 🌀 Cron works with a magical spell called "cron expressions" ✨🔮. These expressions are like secret codes that tell cron when and how often to perform tasks. You can set cron jobs to run every minute, hour, day, or even on specific dates and days of the week! 📅🌌
Example Time! 🎉 Let's say you want to perform a backup every 5AM 🌙. Here's how you'd do it with cron:
Open the cron wizard by running:
crontab -eAdd the magical cron expression:

In this spell, the first two numbers (0 and 5) represent the minute and hour (5 AM). The stars (*) for the other fields mean "every" day, month, and day of the week. 🌟🌈
More Magic! 🪄 You can also perform other cool tricks with cron. Let's say you want to run a script every hour between 9 AM and 5 PM, on weekdays only. Here's your spell:
0 9-17 * * 1-5 /home/ubuntu/backup.sh >> /home/ubuntu/backup.log 2>&1
Unleash the Power! 🚀 With cron's magic in your hands, you can automate backups, schedule reports, and do so much more! 🤩 Embrace the magic of cron to make your Linux life easier and more enchanting! 🧙♀️✨
🤔What Is User👤 Management In Linux🔗?
In this post, we will learn about users and commands which are used to get information about the users. After installation of the operating system, the ID 0 is assigned to the root user and the IDs 1 to 999 (both inclusive) are assigned to the system users and hence the ids for local user begins from 1000 onwards.
User management in Linux is like being the ruler of your own kingdom! 👑🏰 In the Linux world, you have the power to control who can access your kingdom (system) and what they can do.
Imagine This: 🌟 Linux is a bustling city with countless residents (users). Each resident has their own identity, known as a username. You, as the super admin, can grant different privileges and permissions to each resident. Some residents might have access to the royal treasury (administrator rights), while others may only have access to certain areas (limited permissions).
Example: 🧑💼 Let's say you want to add a new resident (user) named "Alice" to your kingdom. You can do it with a simple command:
sudo adduser alice
You set her password (a secret key to enter the kingdom) and give her specific roles and permissions. Maybe you make her a member of the "developers" group, allowing her access to the grand library of codes. 📚💻
More Magic: 🪄 You can also manage existing residents (users) in your kingdom. You might want to change someone's role, remove a user, or even temporarily suspend their access.
Remember: 🔒 With great power comes great responsibility! As the ruler of your Linux kingdom, always ensure you manage users wisely and securely. Protect your kingdom from intruders and ensure that each resident's access is appropriate for their role.
So, whether you're a benevolent king granting access to your noble subjects or a wise queen managing a legion of developers, user management in Linux gives you ultimate control over your kingdom! 👩⚖️👨💻🚀
Now go forth and rule your Linux kingdom with pride and prowess! 🎉🐧🌟
👥Create 2 users and just display their Usernames📜
Using the awk command we have created two users and also display their usernames, please follow belowsteps:
Create the Users: Use the
addusercommand to create the users. For example, to create users "user1" and "user2," run the following commands:sudo adduser user1 sudo adduser user2Display Usernames with Awk: Use the
awkcommand to extract and display the usernames from the/etc/passwdfile:awk -F: '{print $1}' /etc/passwdThe output will list all the usernames, including "user1" and "user2."
Now you have created two users and displayed their usernames using the awk command. 🎉🐧🌟
🚗⛷️Finalization😀.

In this epic Linux journey, you've harnessed the power of scripting with arguments, creating backup masterpieces! 📜💾 Master user management, granting users access to your digital kingdom with finesse. 👑🔑 Automate your magical scripts with the mystic Cronjob, executing tasks at your desired hour. ⏰🔮 Unleash the enchanting awk command to create users effortlessly! 🧙♂️🚀
Now, you're a Linux legend, equipped with the knowledge to script, manage users, and automate tasks like never before. 🌟💻 Embrace the continuous journey of exploration, keeping your Linux legacy thriving! 🌌🏆 Let the penguins guide you as you soar through the vast open-source universe! 🐧💫
May your Linux adventures be filled with joy and wonder! 🌠🎇 Keep scripting, keep managing, and conquer Linux with the magic of your commands! 🧙♀️🔥
Feel free to reach out if you have any questions or need further assistance🚀 by following me on Hashnode, LinkedIn (linkedin.com/in/mahesh-verma-441178250), and GitHub (https://github.com/maheshverma123)..